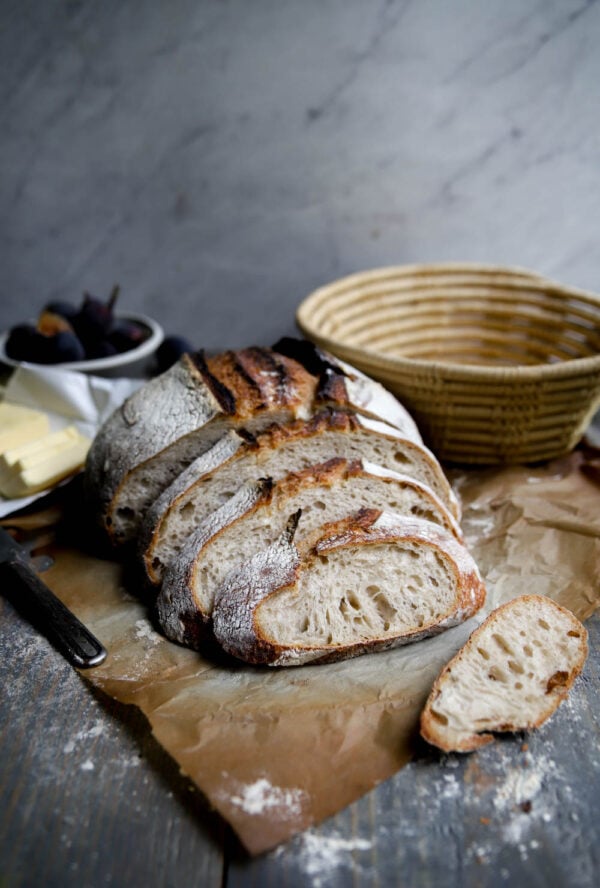
the most hands-off loaf of 100% naturally leavened bread – crusty, airy, chewy Lazy Girl Sourdough™ Bread
let me begin by saying that if you’re even attempting to make your own homemade bread, you’re anything but “lazy” haha. But compared to most sourdough bread recipes, this is a really streamlined process, with very minimal hands-on work. I know you’re going to love it.
We all know that making homemade bread has been a really big deal in 2020. But guess what? Making homemade bread isn’t a trend. Rainbow bagels, funfetti everything, avo toast: those are trends. Humankind has been crafting artisan breads for thousands of years. It is truly the most basic fundamental element of almost every food culture. Not just any bread, civilizations have been harnessing the somewhat mystical powers of wild air-born yeast for just as long. Why do you think Jews eat flat unleavened matzoh on Passover? They didn’t have time for their sourdough breads to rise when they fled Egypt! They had to pack up QUICK and get the hell out of dodge! All that to say, making Sourdough Bread can be time consuming, yes, and more…involved, I get it. In this Lazy Girl Sourdough™ Bread, I’ve removed any and all unnecessary steps of the bread making process. No levains, no kneading, no refrigeration. The result is an incredibly delicious loaf of artisan bread with complex flavors, a beautiful rise, airy crumb, and a real crisp crust.
What is Lazy Girl Sourdough™ Bread?
At the risk of offending a large portion of the bread community, I use an unfed sourdough starter straight from the fridge to make this bread. That’s right. They said it wouldn’t work. Honestly, I didn’t really expect it work, until I began testing this recipe. You know what? It works, and it’s great! I mix unbleached all purpose flour, unfed sourdough starter, salt, and water in a large bowl. I do 2 quick stretches and folds, then let the dough ferment at room temperature for 12-18 hours, until it has doubled in size. Then I shape the dough in a boule (or in a loaf pan), and let it proof for another 2-3 hours at room temperature. As always, the bread is baked in a enamel coated cast iron Dutch Oven in a very hot 450 degree F oven. That’s it.
Any Cons, you might be wondering? Ok, so if the crumb of a traditional Sourdough Bread is 100% airy and hole-y, the Lazy Girl Sourdough crumb is 85% hole-y. It really doesn’t bother me, and I’m pretty confident that it won’t bother you either. The crumb is a bit tighter, but I actually kind of like it because my delicious melty salted butter doesn’t fall through the holes. That’s the end goal, right?
Of course, I’m still all about traditional sourdough bread, made with a levain, etc etc. But, life happens, and you shouldn’t have to sacrifice great bread because you can’t babysit your dough.
Ingredients for Baking Sourdough
- Flour – For this loaf, I use unbleached all purpose flour from King Arthur Baking Company. It has a higher protein content than most AP flours. You could bread flour if that’s what you have. If you want to add whole grain flour, replace 100g of the total flour amount with the whole grain flour of your choice. Do not substitute the total amount of flour for whole grain flour, as the results will vary greatly, and you will likely end up with a much more dense loaf of bread.
- Water – I use filtered, room temperature water. Spring bottled water would work too. You just want to avoid using tap water that may have added “purifying” chemicals like chlorine, which can kill sourdough yeast bacteria, and prevent fermentation.
- Sourdough starter – A whole wheat, all purpose, rye, or spelt sourdough starter would work really well. Each starter will result is different flavors in your loaf, but that’s part of the fun of this break baking experimentation. Use your UNFED starter, straight from the fridge. If it has been longer than 1 month since you’ve fed your starter, I suggest giving it at least one feed prior to baking.
- Kosher salt – I use Morton’s kosher salt in all of my bread recipes. If you are using Diamond Crystal, add another 4 grams of salt.
Additions and Substitutions
This recipe is formulated using very basic unbleached all purpose flour. You can substitute high protein bread flour instead, if that’s what you have. Want to add more whole grain flour? Replace 100g of flour with whole wheat, medium rye, or spelt flour. Sometimes I love to add a variety of seeds, like sunflower, pumpkin, sesame, and flax into my loaves. Feel free to mix those in when you do your stretches and folds.
Is Sourdough Bread good for you?
Sourdough bread is a great alternative to regular white and whole wheat bread. It has lower phytate levels, which make it more nutritious and easier to digest. Sourdough bread has prebiotics which can help maintain a healthy gut. Since sourdough bread is easier to digest, people that suffer from gluten allergies/sensitivities usually can enjoy sourdough without issues. Sourdough bread also seems less likely to spike your blood sugar levels, which it a healthier option for people that suffer from diabetes or high blood sugar.
How long is Sourdough Bread good for?
Keep your freshly baked sourdough bread in an airtight bag at room temperature for up to 4 days. After that, it’s best to keep any leftover bread in the freezer. Frozen slices or loaves of bread can be stored in the freezer for up to 2 months. I often slice the bread, then freeze, so that I can pull out a few slices when I want them, then reheat in the toaster. If you want to freeze a whole loaf, let it thaw at room temperature, then reheat in a 350 degree F oven for 10 minutes. Pro tip: sprinkle the crust with water for a freshly-baked crispy crust. When freezing bread, try to remove as much air from the bag as possible to avoid freezer burn.
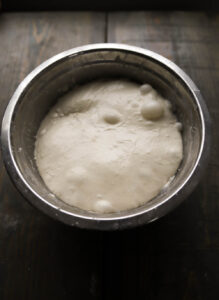
after 18 hour bulk fermentation at room temperature
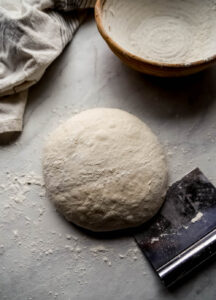
preshape
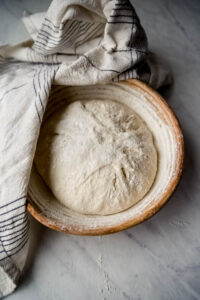
final shape in floured proofing basket, ready for the 2nd rise at room temperature
Lazy Girl Sourdough Bread Baking Schedule + Timeline
Day 1:
6:00pm – Mix dough, cover and
6:20pm: Stretch + fold #1, cover, let rest
6:40pm: Stretch + fold #2, cover, let bulk ferment at room temperature for 12-18 hours or until doubled in size and bubbly
Day 2:
9:00am – Shape loaves, cover, then proof at room temperature
11:00am – preheat oven with Dutch oven inside
12:00pm – Bake bread (pretty simple, right?)
**If you want more flexibility, you can let the loaf do the 2nd rise in the fridge for up to 12 hours after you’ve shaped the dough in the basket. Remove from the fridge, then go straight into the oven.
Without further ado, I’m so excited to share this recipe with you.
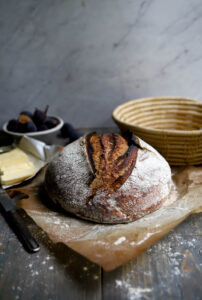
THE EQUIPMENT I USE
8″ round or 10″ oval proofing basket
Love this recipe? Be sure to check out Everyday Artisan Bread, Same day Country Loaf, and Sourdough Baguettes
I can’t wait for you all to bake this Lazy Girl Sourdough Bread! It is so simple to throw together, you’ll be making loaf after loaf, I promise. As always, be sure to tag me @lions.bread so I can see your creations. Want to watch out how I make it? Head to instagram for a FULL VIDEO TUTORIAL 🙂
love – LeAnne
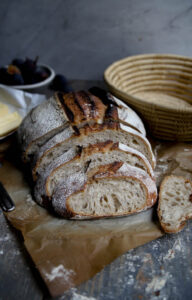

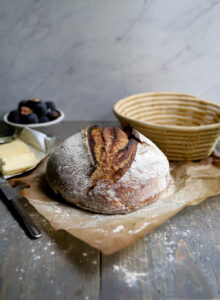
Lazy Girl Sourdough™ Bread
the most hands-off loaf of 100% naturally leavened bread - crusty, airy, chewy Sourdough Bread, even if you're feeling a bit lazy
Ingredients
- 500 g unbleached all purpose flour
- 375 g filtered water, room temperature
- 12 g kosher salt (I use Morton's) use 2.5 tsps if you're using Diamond Crystal
- 90 g sourdough starter, fed or unfed is fine
Instructions
In a large mixing bowl, combine water and sourdough starter, using your hand to dissolve the stater into the water. Add the flour and salt. Use a danish dough whisk or your clean hands to mix the dough. Pinch the shaggy dough to incorporate all of the flour. Scrape the bowl as you go. The dough will be very shaggy. If it feels really dry, add another tablespoon or two of water, and keep pinching and mixing until no dry patches of flour remain. Cover the bowl with a clean kitchen towel, and let rest for 20 minutes.
Do 1 stretch and fold rotation around the dough. Lift up one side of dough, and stretch it up gently, then lay it over the ball of dough. Continue lifting sides of the dough, until you've worked your way around the entire ball of dough. Use you hand to scoop up the dough ball, and flip it over. Cover with a kitchen towel, and let rest for another 20 minutes.
Repeat the stretch and fold process all the way around the perimeter of the dough, then flip the dough over. Cover with plastic wrap, or a dough cover, and let bulk ferment (rise) at room temperature for 12-18 hours, or until the dough has doubled in size.
Flour a proofing basket really well. Or, you could line a medium size mixing bowl with a clean kitchen towel, and thorough cover the inside of it with flour. Pour the dough out onto a well floured work surface. Do a quick preshape by bringing all 4 corners of the dough into the middle, overlapping. Flip it over and let it sit on your floured board for about 10 minutes. Now for the final shape: flour your work surface again. Flip the dough over, and begin bringing the sides in towards the center, then roll the dough up, until a nice tight boule is formed. For more tension, you gently drag the dough towards you on the board. Pinch the bottom shut, and place SEAM SIDE UP in the prepared proofing basket. Sprinkle the top with flour, and cover with a kitchen towel. Let the dough rise at room temperature for 2-3 hours until it puffy, jiggy, and has almost doubled in size.
Preheat your oven to 450 degrees F, with a enamel coated coast iron Dutch oven inside. When your dough has risen, turn it out onto a piece of parchment paper. Slash/score the top with a lame or sharp chef's knife. The slash can be decorative, or a simple straight line down the center, about 1/2" deep. Remove the extremely hot dutch oven from the oven, using oven mitts, and remove the lid. Lift the corners of the parchment paper with the dough on it, and gently place into the hot pot. Cover with the lid, and bake for 25 minutes. Remove the lid, and return the pot to the oven for another 25 minutes to allow the loaf to brown. The crust should be dark brown, even mahogany in some places.
Remove the baked loaf, and allow to cool completely on a rack before slicing into it. This should take about an hour.
The best way to store fresh bread is in a paper or plastic bag at room temperature for up to 4 days. If you want to freeze the bread, slice it first, then freeze.
Recipe Notes
Your sourdough starter can be fed or unfed. I often use mine cold from the fridge. If you haven't used your starter in more than 1 month, I would feed it at least once before using it here.
**head to my instagram @lions.bread for a FULL VIDEO TUTORIAL
The post Lazy Girl Sourdough™ Bread first appeared on Lion’s Bread Blog.
*This post may contain affiliate links. Thank you for continuing to support the brands that make Lion’s Bread possible.


Andrea Valadez says
I have made many of Lion’s Bread recipes and love all of them! But out of all her bread recipes this really is the easiest and simple to do while achieving an amazing result!!! The effort is minimal and the taste is superb!!! A must try for every level of baker!
Jennifer Siegel says
so easy…so yummy. thanks Leanne. no more waiting for 3 days for sourdough! it wasn’t particularly sour but I don’t love super sour anyway!! make this bread!!
LeAnne says
I’m so glad that you enjoyed it! If you want a more sour flavor, try adding another 20 grams of starter 🙂
Chari says
Would you recommend this for countries with warm and humid climate?
LeAnne says
You can absolutely make this in a warm and humid climate, but the rise timing will probably be much faster. Watch the dough, not the clock. Once it looks puffy and bubbly and doubled in size, it’s ready to be shaped.
Kristie K says
Simple and delicious. Easy is not the right word because you are making homemade bread, but the step by step, easy to follow instructions made the whole process SIMPLE and the results were fantastic! The flavor is incredible; the crust has great crunch; the airy texture on the inside just screams for butter 😉 I can’t wait to continue to feed my starter and make this bread over and over again. I highly recommend giving this recipe a try.
LeAnne says
Thank you SO much Kristie! Simplicity is absolutely what I was going for when I created this recipe. Bread screaming for butter is always a good thing 😉
Tammy A says
If you’re on the fence about making sourdough or you’ve never made one before, THIS is the perfect recipe to try! Simple, straightforward and best of all, you can enjoy the fruits of your labor in just half the time!! Start this tonight and you’ll be enjoying your fresh bread by tomorrow afternoon. This is the bread my family asks for over and over. Your house will smell like a bakery ; one taste & you’ll think you just walked out of a boulangerie in Paris! Slather with your best butter & some flaky sea salt and enjoy. This recipe is a keeper!! Thanks, LeAnne!
LeAnne says
THANK YOU so much Tammy! That means more than you know 🙂
Josée says
Hi dear,
I was so excited as I saw your post! I’m doing sourdough bread since a while but I don’t have always time to do the whole process so I couldn’t wait to try your lazy bread! Unfortunately my dough was after the 12-15 hours to soft that I couldn’t shape it. I did exactly the same as in your receipt. Any idea what it can’t be or what to change?
Thanks a lot
LeAnne says
Hi Josee,
I’m sorry to hear that. With sourdough and other fermentation recipes, there are so many factors that determine the end result. If your kitchen is warmer, the temperature can really speed up the fermentation process, which will result in an overproofed dough after 15 hours. If you try it again, try to keep the dough at around 68 degrees F. Try to reduce the amount of water by about 40g and see if that gives you a better result.
-LeAnne
Anna Schipp says
the recipes are all fantastic! I’ve been baking a lot since the pandemic and came across lions bread about a year ago. with the help of the instagram stories I can really make every recipe. the sourdough is a particular challenge, as we have different flour, water, temperatures and humidity in italy. and still the bread will be excellent! Thanks a lot! I’m already looking forward to my next attempts at back.
WQKGMFPxqakpwoBr says
GYFHnNSsy
George Haas says
BEST sourdough I’ve made.
Mallory says
Most successful (and easiest) recipe I’ve ever used! I’ve never gotten the best rise with my sourdough, but my starter loooooves this recipe – I’ve been making loaves like crazy and they’re perfect every time 🤩
LeAnne says
Thank you so much Mallory! I’m so glad you love it 🙂