Flakey, buttery Homemade Cheese Danish that are perfect for a special weekend breakfast or brunch
WHAT IS A DANISH?
This kind of pastry is a flakey, buttery type of puff pastry that originates from Denmark. Danish pastries are in the same “viennoiserie” family as croissants and puff pastry. The viennoiserie process involved layering butter between very thin layers of dough.
HOW TO MAKE Breakfast DANISH AT HOME
- To make these Homemade Cheese Danish, I whipped up a batch of my own 15-minute puff pastry. I know making your own puff pastry sounds intimidating, but I promise it’s actually really simple, and not at all fussy like croissant dough. Here’s a foolproof method for creating flakey layers in about 15 minutes. I HIGHLY recommend making your own, it’s such a game changer, and definitely takes your bake to the next level.
- That being said, you could use and all-butter puff pastry from the store. My all time favorite brand is Dufour brand, if you can find it.
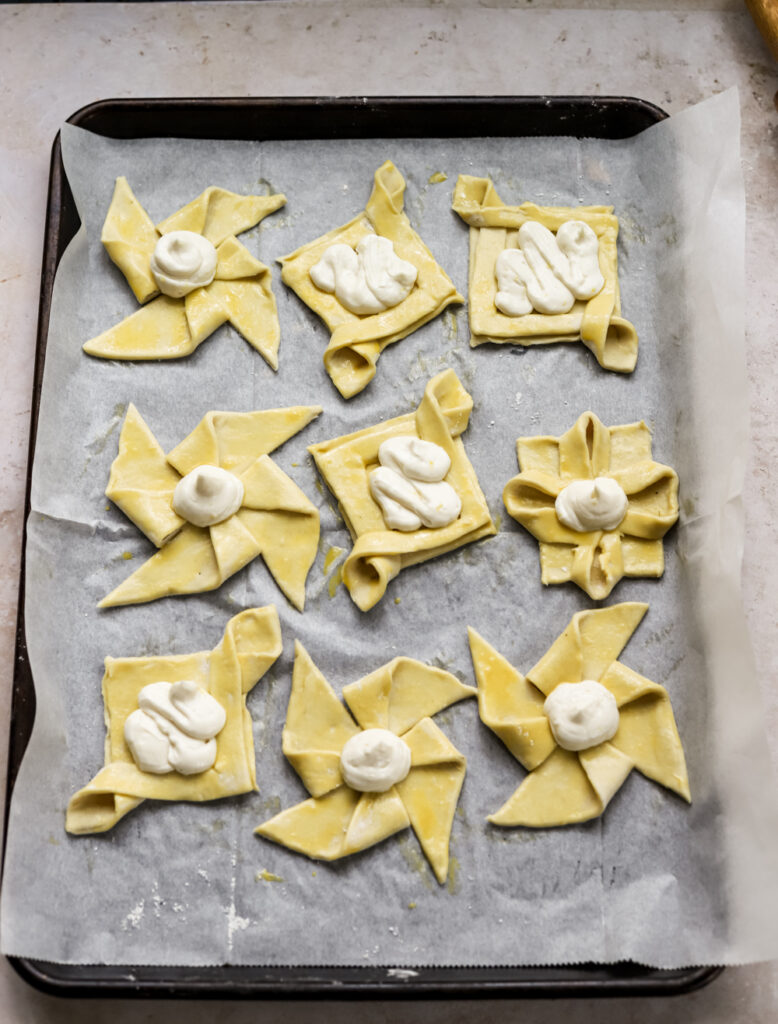
- Then I mix 6 oz. room temperature cream cheese with about 1/4 cup granulated sugar, a teaspoon of fresh lemon zest, a tablespoon of sour cream, and pure vanilla extract. Use a fork to beat until it’s really smooth and well combined. This alone tastes like cheesecake, and is completely addictive. use a piping bag (or a zip top bag with the corner cut off) to pipe a generous tablespoon of the cream cheese mixture into the center of each piece of pastry. I brush the exposed edges of the pastry with a beaten egg, then bake for 20-25 minutes at 400 degrees F.
- After they’re baked I top them with fresh berries, thinly sliced clementines, or you spoon on your favorite jams/preserves. The take it over the top, and make them look like they just came out of a French pastry case, brush the berries/fruit with real maple syrup or thinned apricot jam for extra shine!

Ingredients
- puff pastry – please please please try making your own! This 15-minute puff pastry is a breeze, and you can make a double batch and store them in the freezer. Just thaw in the fridge before you’re ready to use it. Once you try it, I promise you’ll never go back, it’s so simple, buttery, delicious and flakey!
- cream cheese – I always use full fat Philadelphia cream cheese because it gives me consistent results and I love the flavor.
- lemon zest – Be sure to wash your lemons before you zest them! I use a sharp microplane zester for this, and it’s one of my most used kitchen tools.
- sugar – I use granulated sugar in this recipe. You could also use the same amount of powdered sugar, either works!
- sour cream – The sour cream in the cream cheese filling adds extra creaminess and a beautiful light texture that makes the filling easy to pipe into the center of the Danish. I use full-fat sour cream always.
How to fold Homemade Danish
There are so many different ways to intricately fold homemade breakfast pastries, but I like to keep it pretty simple. For a FULL VIDEO TUTORIAL, check out this video on Instagram.
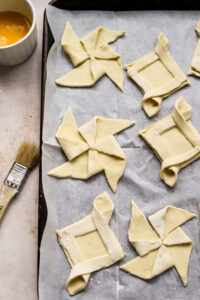
Once you’ve cut your pastry into squares, fold it in half to make a triangle. Then, use a sharp knife or a bench scraper to cut two partial slits down the open sides, leaving the top 1/2″ of dough connected. next, open the pastry back up into a square. Fold one of the cut slits over to the opposite side. Then fold the other slit over to the opposite side.
Another adorable fold is the pinwheel shape. Cut 1.5″ diagonal slits from the corners down toward the center of the dough. Fold every other cut corner piece down toward the center to create the classic pinwheel.


What is the secret to Puff Pastry?
Three words. Keep it cold. Puff pastry is full of butter and has really a high fat content. The more you handle the dough, the warmer the butter gets, and it begins to melt. When the butter melts, the dough gets really sticky and is very difficult to work with and handle.
So how do you prevent this? Start with really cold dough, not frozen, just very cold from the fridge. Next, try not to handle the dough much with your hands. Use quick motions, and use the rolling pin as much as you can.
If the dough does start sticking and melting, just place it back in the fridge or freezer for about 10 minutes to allow the butter int he dough to firm back up. Trust me, don’t be a hero, just put it back in the fridge.
Your finished pastries will be 100x more delicious if the pastry is cold when it goes into the hot oven. When cold pastry bakes at a high temperature, the water in the butter turns to steam and creates flakey layers in the pastry. If the butter is too warm when it goes in, it will just melt into pools in your oven.

I really hope that you make these, they’re so delicious, really impressive, and perfect for a lovely weekend brunch. As always, please remember to tag me in any of your posts @lions.bread so I can see what you’re making from the blog! Nothing makes me happier than seeing my recipes come to life in your kitchens!


To pin this recipe and save it for later, you can use the button on the recipe card or on any of the photos above. Happy baking!
Did you make these Breakfast Danish? Rate it and leave a comment below!
Homemade Cheese Danish Recipe
Flakey, buttery Homemade Cheese Danish that are perfect for a special weekend breakfast or brunch
Ingredients
- 1 sheet puff pastry
- all purpose flour, for dusting
- 1 egg beaten for egg wash
- 6 tablespoons cream cheese at room temperature
- 2 tablespoons granulated sugar
- 1½ teaspoons fresh lemon zest
- 1 teaspoon pure vanilla extract
- 1 tablespoon sour cream
- fresh strawberries, blackberries, raspberries, clementines
- 1/4 cup pure maple syrup for glazing the fruit
Instructions
Preheat the oven to 400°F. Line a rimmed baking sheet with parchment paper.
Make the Cream cheese filling: In a medium size mixing bowl, combine the room temperature cream cheese, sugar, lemon zest, vanilla extract, and sour cream. Use a fork to mash it all together at first, then stir the mixture until it is really smooth and well combined. Place the filling in a piping bag, or a zip top bag with the corner cut off.
Place the very cold puff pastry on your well floured work surface. Roll it out into a large square about 12"x12". Use a sharp chef's knife or a bench scraper to cut the pastry into 9 squares.
If the pastry gets warm and starts to stick at any point, put it back into the fridge or freezer for 5-10 minutes to let it firm back up.
Place the squares of pastry onto the prepared parchment-lined baking sheet. Fold and shape the squares into your desired shape. See the notes above about shaping Danish, and check out my video tutorial on Instagram. Put the pastries in the fridge or freezer for 10 minutes to firm up.
Brush the pastries with the beaten egg. Then pipe a generous tablespoon of the cream cheese mixture into the center of each pastry.
Bake for 20-25 minutes until the pastry is golden brown, puffy, and flakey. It's ok if the tops of the cream cheese brown slightly.
Remove the pastries from the oven. Allow to cool for 5 minutes. Then arange the fresh berries and fruit on top of the cream cheese filling in the center. To make your Danish look like they just came out of a French pastry case, brush the top of the fruit with the pure maple syrup or thinned apricot jam for extra shine.
Recipe Notes
Make sure that your puff pastry stays cold at all times. If it starts to get sticky, it means that the butter in the pastry is getting too warm. Just place it in the fridge or freezer for 5-10 minutes until it firms back up.
The post Homemade Cheese Danish Recipe first appeared on Lion’s Bread Blog.
*this post may contain affiliate links, which means that a small portion of the sale goes to me, without any additional cost to you. Thank you for supporting the brands that keep Lion’s Bread going.


